


Cracks in walls are a usual issue in lots of houses. Whether your house is new or old, wall cracks can show up for many reasons, like natural settling, water damage, or building problems. While some wall crack repair are not bad, others may mean deeper troubles that need care. No matter the cause, timely wall crack fixes are key to keeping the strength and look of your home.
In this blog we will look at the good ways to fix gaps in walls at home. This helps you know how to deal with small surface gaps and big building issues.
Identify the Type and Cause of the Crack
Before starting a wall crack fix, it’s important to find out the kind and reason for the crack. Not every wall crack is alike. Some are shallow, while others may suggest deeper harm to structure.
- Hairline Cracks: These are very thin and usually appear in plaster or paint. They are often caused by seasonal expansion and contraction.
- Vertical Cracks: Often due to settling or slight foundation movement, these are generally not serious.
- Horizontal Cracks: These may indicate more serious structural issues, especially in basement walls.
- Diagonal Cracks: Usually found around windows or doors, often caused by foundation shifting.
Knowing the kind of split will show your fix plan and help you pick if a do-it-yourself way is good or expert aid is needed.
Effective Methods to Fix Deep or Wide Cracks in Walls
1. Assess the Severity of the Crack
Before you start any wall crack fixing, it’s important to look at the crack. Check how wide and long it is. Cracks wider than 5 mm or going across may show problems with the building. If the crack seems to be getting bigger or has water leaking or floors that are not flat, it’s smart to talk to a building expert. Knowing how bad it is helps you decide if a do-it-yourself fix will work or if help from a pro is needed.
2. Prepare the Cracked Area Thoroughly
Good readying is important for a long-lasting wall split fix. Use a utility knife or chisel to make the split wider, forming a V-shaped groove along its path. This way helps the filling stuff stick better. Clean the space of dust, junk, and any flaking paint with a brush or vacuum. For best sticking, it’s smart to slightly wet the crack before putting on any repair things.
3. Choose the Right Crack Filler Material
For big or broad holes, normal wall paste might not be enough. Choose a cement filler or epoxy filler, which gives more strength and bendability. Cement fillers work well for plaster and concrete walls, but epoxy fillers are great for spots needing strong support. Always follow the maker’s directions to make sure of the right mixing and putting on.
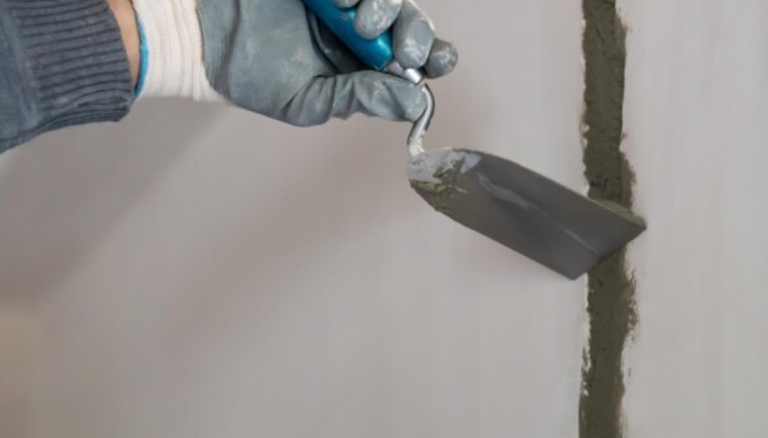
4. Apply the Crack Filler in Layers
Big gaps should not be packed in one go. Instead, put the stuff in layers, letting each layer dry fully before putting on the next. Use a putty knife to press the material tightly into the gap and make the surface smooth. This way stops shrinking and cracking of the filler itself, ensuring a stronger wall gap fix.
5. Reinforce with crack repair tape if needed.
For long or repeated gaps, putting strong mesh tape before adding the filler gives more support. Put the tape over the cleaned gap and cover it with joint material or filler. This method is often used in wall fixes and greatly lowers the odds of the gap coming back. It’s very handy in homes with many temperature shifts or shakes.
6. Allow Proper Curing Time
One of the most missed parts in wall crack fixing is allowing enough drying time. Based on the filling stuff, the drying time can be from a few hours to some days. Don’t sand or paint over the fix until it’s totally dry. Hurrying this step can hurt how well the fix works and cause more harm later.
7. Sand, Prime, and Paint for a Clean Finish
When the filler is all set, rub the top with soft sandpaper until it looks nice ͏with the rest of the wall. Clean off any powder before putting on a primer to cover the top. After priming, paint the spot to fit with the other part of the wall. This last step brings back your wall’s beauty and finishes the wall crack fix easily.
8. Monitor the Repaired Area Over Time
Even after a good fix, it’s key to watch the spot for any signs of coming back harm. Cracks that show up again might mean bigger issues under the surface that need help. Checking often, especially in wet or shaky places, can let you deal with troubles early. Staying ahead makes sure your wall crack repair plans stay strong for many years to come.
Best Waterproofing Solutions To Prevent Wall Cracks
A good way to stop wall crack repair from coming back a lot is by using͏ strong waterproof methods that block wetness right where it starts. Water getting in is a big reason for wall harm, making cracks that get bigger over time if not fixed. By putting on waterproof layers to outside walls, closing off damp spots inside, and keeping roofs and foundations safe from water leaks you can cut down the strain on your wall surfaces. This smart plan not only helps your walls stay solid but also cuts back the need for costly repairs in future
FAQ About Wall Crack Repair
Q1: What causes cracks in walls at home?
Usual causes are ground settling, heat grow͏th, water leaks, bad building stuff, or support problems.
Q2: Can I repair wall cracks by myself?
Yes, tiny lines and top cracks can be fixed with wall filler or patch paste. For bigger or repeating cracks, talk to a expert.
Q3: How do I know if a wall crack is serious?
If the gap is big, getting bigger, or goes across in a zigzag or step-like way, it might mean a problem with the structure and should be looked at by expert.
Q4: What tools do I need for wall crack repair?
Simple tools are a putty knife, scraper, sandpaper, fill material (like putty or joint compound) primer and paint.
Q5: How long does wall crack repair take?
Small splits can be mended in a couple of hours. Bigger cracks might need many tries and dryin